References and measurement standards
Calibration usually takes place with the help of a “more accurate” measuring device. This device is referred to as the reference, the measurement standard or superior measurement standard. It is crucial here that the influence of the Reference on the result of the calibration of the meter under test is negligibly small. To guarantee this, there is something called the 1/5 rule. This rule states that the uncertainty of the reference may be a maximum of 1/5 of the targeted calibration uncertainty. In individual cases, the factor between the meter under test and the reference may be 1/3 but in general it can be said that higher values (1/10) are the goal.
The superior measurement standard
So who has the “right” measuring device? To tackle this problem, 17 European states came together in 1875 with the goal of presenting and using specific units consistently.
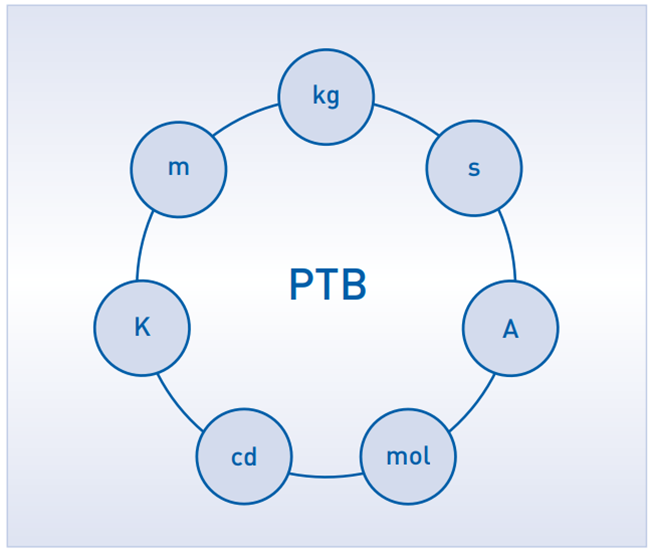
The meter and kilogram were adopted as the superior measurement standard and the production of prototypes, which should then be used as the material measure, was set. Today, the so-called SI system® comprises 7 base units: kilogram, meter, second, kelvin, ampere, mole and candela. The number of states has now grown to 51. How these units are represented lies within the jurisdiction of each country. In Germany, for example, they are administered by the Physikalisch-Technischen Bundesanstalt (PTB), in the Netherlands by the Netherlands Metrology Institute (NMI) and in Austria by the Bundesamt für Eich- und Vermessungswesen [Federal Office of Metrology and Surveying]. The current definition of the 7 base units can be found at www.ptb.de. The material measures or technical apparatuses that depict these units are called national measurement standards, superior measurement standards or primary measurement standards. Nowadays we try to make it possible to depict the base units with the help of natural constants such as Avogadro’s number or the speed of light. Unlike the material measures (kilogram and meter), this has the advantage of displaying with less measurement uncertainty. Not until 1960 was the platinum-iridium rod replaced by a new definition. The last remaining material measure that is currently valid is thus the international kilogram prototype.
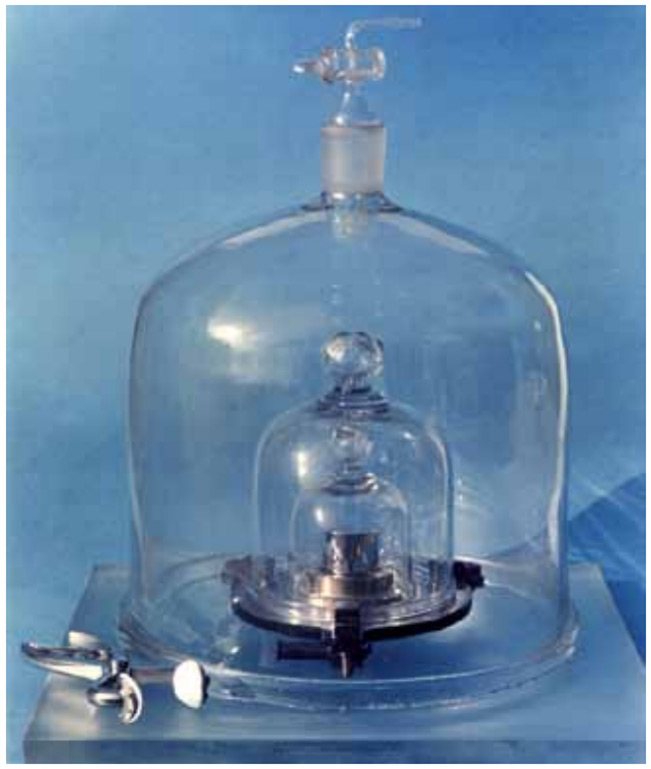
If a measuring device is calibrated against a reference that was calibrated at a national institute, the calibration is said to be “traceable to a national measurement standard”. This traceability makes it possible to compare the calibration results of all measuring devices traced back to this measurement standard. The example of the international kilogram prototype demonstrates how the tracing of a measurement is structured. At the peak of achievable accuracy is the international kilogram prototype, see Figure 9.2, a platinum-iridium cylinder which by definition embodies a mass of 1 kg (material measure). Directly affiliated with this are the national kilogram prototypes of the individual member states.
Figure 10.1: SI base units
Figure 10.2: International kilogram prototype
As a rule, each member state has just one of these, to which main measurement standards made of stainless steel are in turn associated and which are recalibrated on an annual basis. Germany, in addition to the original kilogram which was damaged in the second world war, has a valid duplicate from the former DDR.
With the help of the transfer of measurements structured in this way through their traceability to a superior measurement standard, the associated measurement standards guarantee on the one hand the comparability of the measurements and on the other hand they guarantee that the consumer is getting a product whose volume lies within statutory error limits.
To make a comparable statement about the accuracy of the measurement, the measurement result is assigned the so-called measurement uncertainty. Without this information, the measurement result is incomplete. Measurement uncertainty refers to the quality or accuracy of the measurement and is usually expressed using the same unit with a “±” after the measurement result. For example, for a measured length, the information 21.0 mm ± 0.5 mm means that there is a 95% chance that the actual value of the measurement result (this can also be called the “agreed value”) lies in the range of 20.5 mm to 21.5 mm. The specification of measurement uncertainty for a flowmeter generally refers to the measuring range outlined in the specifications and is usually stated as a percentage of the measured value or of the measurement range end value. Even the measured volume of flowing liquids is assigned a measurement uncertainty which depends among other things on the reference used. When it comes to precision calibrations, the flowing volume is measured using gravimetric or volumetric calibration rigs. The designation of the measurement uncertainty in this case occurs by way of an observation and evaluation of all of the input variables affecting the measurement in a so-called measurement uncertainty analysis.
As a general rule, the calibration of a measuring device does not have unlimited validity in terms of time. To counteract systematic measurement errors caused by ageing, drift, environmental influences or similar, it is necessary to calibrate measuring devices within defined time intervals. This is known as recalibration or a recalibration interval. The shorter the intervals, the sooner any systematic measurement errors can be detected and corrected.
Definitions
Calibration
The determination of the relationship between the measured value or expected value of the output variable and the associated true or correct value prevailing as the input variable for observed measuring equipment with specified conditions (DIN 1319).
Adjusting
An activity that puts a measuring device into a usable state. As a rule, this refers to the determination and correction (by way of permanent intervention into the device) of a systematic measurement error.
Verification
A state government inspection of a measuring device subject to statutory metrology which is conducted by a calibration authority or a nationally recognised testing body. The verification process includes determining the measurement error, tamper-proof lead sealing and affixing the calibration seal. The measured values must lie within the maximum permissible errors. These limits depend on the measuring device and the accuracy class. The German calibration law and calibration ordinance govern all the particulars.
Conformity assessment
A test to determine whether a measuring device complies with the requirements of the European measuring instrument directive (MID). This directive defines various conformity assessment procedures which may contain metrological tests. The conformity assessment replaces the initial verification and unlike it, the assessment is valid throughout the entire European Economic Area.
Systematic measurement error
Mean value resulting from an unlimited number of measurements of the same quantity, conducted under reproducible conditions minus a true value of the quantity being measured. The value of a measurement standard is generally taken as the “true value”. However, because the true value is based on an endlessly large number of measurements, it is also known as the “correct value” or “agreed value”.
Random measurement error
Measuring result minus the mean value that would be arrived at from an unlimited number of measurements performed under reproducible conditions.
Reference
A standard, measuring device, reference material or measuring system whose purpose it is to determine, represent, conserve or reproduce a unit or one or more values of a quantity. (International Dictionary of Metrology, 2nd Edition 1994)
DKD
Abbreviation for the “Deutscher Kalibrierdienst” [German calibration service]. An amalgamation of German calibration laboratories in industrial enterprises, research institutions and technical authorities whose aim it is to formally approve the actions of the German national institute as regards measurement tasks, to privatise parts of the national duties and responsibilities and ultimately to reduce trade barriers.
Influences in practical use
When you consider the calibration values of a flowmeter, ideally they should not deviate from the measuring values in the application.
References and measurement standards
Calibration usually takes place with the help of a “more accurate” measuring device. This device is referred to as the reference, the measurement standard or superior measurement standard.
Calibrations at KROHNE
KROHNE has calibration options for all kind of measuring devices at different locations worldwide.


