Calibration in the measuring technology industry
“Is this device calibrated?”, is a typical question heard relatively early on when using measuring devices. To answer this question in a satisfactory manner, different aspects of calibration are explained in what follows.
What is calibrated?
In principle, any physical trait of an object can be calibrated. This includes not only variables encountered in flow measurement technology like volume flow, mass flow, level and volume but also many other measurements found in day-to-day life such as temperature, length, mass, thermal energy, noise level velocity etc. When it comes to flowmeters it is usually the signal of one pulse output, where one pulse stands for one flowed through mass or volume, or a 4-20 mA output, which provides a signal in proportion to the volume, that is calibrated.
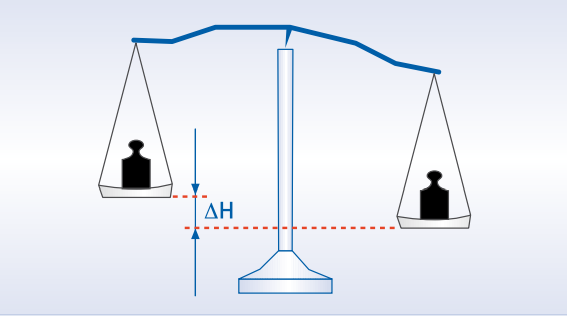
Figure 1.1: Beam balance
What is calibration?
Basically, calibration is a comparison of measurements followed by a written report of the results, the so-called systematic error of measurement. The resulting document is generally referred to as a calibration certificate or calibration protocol. Examples of calibration certificates can be found on page 26. The result of the comparison when calibrating is expressed as a difference, i.e. the deviation of the measurement of the device to be calibrated from the more accurate reference device. This difference can be expressed as a deviation in the unit of the quantity measured or as a percentage. The reference is then either the measured value or the measuring range end value.
Typically, during calibration the measurement of the meter under test is compared to that of an identical or similar, more accurate measuring device. The example of the beam balance clearly demonstrates this: the left-hand side holds a 1 kg weight to be calibrated and the right-hand side holds a very accurate 1 kg weight. The difference in mass of the two weights results in a mass-scaled height difference between the two balance trays.
Flowmeter calibration
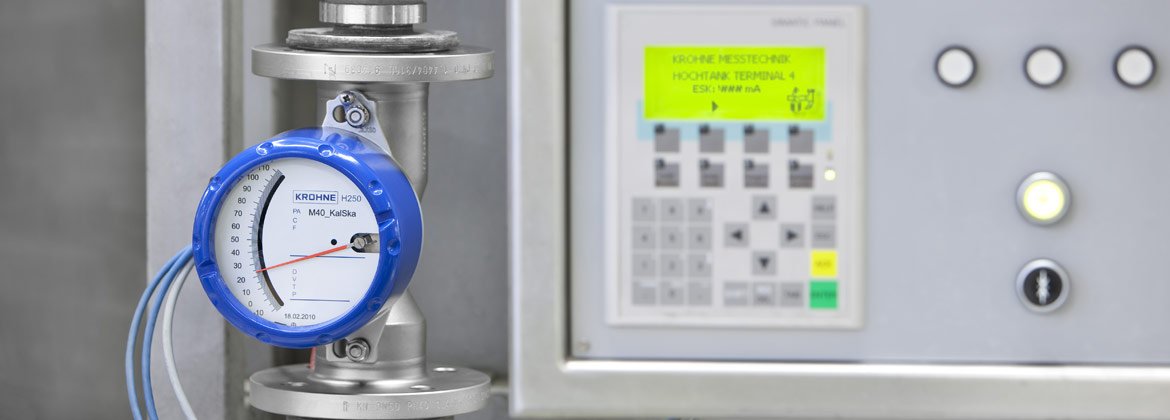
Flowmeter calibration generally takes place under fixed medium conditions like temperature, pressure, conductivity and volume flow as well as fixed ambient conditions such as pressure, temperature and humidity. What is calibrated is a pulse or frequency output, a 4-20 mA output, less frequently the display or bus signals. Depending on the accuracy required for the calibration, various processes including reference meters and gravimetric or volumetric liquid flow standard measurement calibration rigs may be used where the reference should have between three to five times less measurement uncertainty than the device to be calibrated. Reference meters are often used for calibration when similar measurement variables (e.g. variable area flowmeters) or measuring devices with defined error limits are calibrated, see Fig 1.2.
Figure 1.2: Flowmeter and reference
However, instead of flowmeters, flow calibration rigs are now used as the reference for precision calibration. In this case the flowing mass or volume is displayed via a mass and density measurement or volume measurement. This ultimately enables the most accurate measurement of the volume or mass of flowing products. Here, we distinguish between calibration rigs based on either the volumetric or gravimetric principle, see Fig 1.3 and Fig 1.4.
In the case of volumetric calibration rigs the volume flowing through a meter under test is compared to the reference volume of a cylinder, tower or tank with an interior volume that is precisely known. The reference volume can be determined geometrically or by volumetric measurement in intervals using reference volumes. So-called piston prover systems are also based on the volumetric principle. With these systems, a known volume of a test product is pressed out by a propelled piston, passing through the meter under test into a storage tank. When the piston is pulled back, further measurements are made possible.
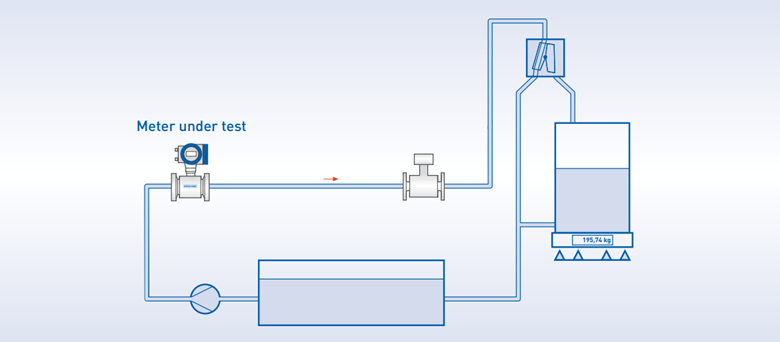
When it comes to gravimetric calibration rigs, the volume (or mass) flowing through the meter under test is compared to the indicator on a scale. The reference volume is then determined using the density of the product and by taking into account the various influencing variables on the measuring process. In most cases, testing is done in flying start-stop mode, whereby a diverter routes the product into the scale, or in standing start-stop mode. The calibration of the scales is typically done using stainless steel standard weights in accuracy class F2.
Figure 1.3: Volumetric calibration rig
Figure 1.4: Gravimetric calibration rig
Why calibrate?
In principle, measuring devices are calibrated to gather information about the current behaviour or condition of the measuring device at the time of calibration. Any calibration is always tied to the existing temporal and local conditions. Prognoses about the behaviour of the measuring device in the application can be made, for example, based on experience or farther-reaching tests.
In regards to the information gathered about the measuring device during calibration, a distinction is generally made between industrial and legal metrology. In the field of industrial metrology, i.e. for use in the food and beverage industry, pharmaceuticals, the oil and gas industry for mixing and dosing processes, feeding plants etc., requires measuring devices that measure the mass flow as stable as possible and without fluctuations. On top of that, the devices must be able to display the same values over longer periods of time, i.e. they must have good long-term stability. This ensures high process stability.
In the field of legal metrology, i.e. anywhere goods must be billed, the measuring devices must measure within the maximum permissible errors and be regularly recalibrated, which is called verification (see also calibration law and calibration ordinance).
With the introduction of the Measuring instruments directive 2004/22/EC in 2004, custody transfer was standardised on a European level and it became legal in Germany on 30 October 2006. In addition to the general, fundamental requirements such as error limits, suitability, resistance etc., the device-specific part defines the requirements using 10 different types of measuring devices. These are:
| MI-001 | Water meters |
| MI-002 | Gas meters and volume conversion devices |
| MI-003 | Active electrical energy meters |
| MI-004 | Heat meters |
| MI-005 | Measuring systems for the continuous and dynamic measurement of quantities of liquid other than water |
| MI-006 | Automatic weighing instruments |
| MI-007 | Taximeters |
| MI-008 | Material measures |
| MI-009 | Dimensional measuring instruments |
| MI-010 | Exhaust gas analysers |
In addition to standardised European technical requirements on the respective measuring devices and unlike domestic law, the conformity assessment (formerly initial calibration) can now also be performed by the manufacturer (module D). The conformity of a measuring device can also be evaluated by an independent, third party which becomes an authorised body through accreditation (module F). The conformity assessment according to module D or F takes place in combination with a European type examination certificate (module B). A measuring device that has been evaluated for conformity obtains a declaration of conformity from the manufacturer and can now be made available to an end user (released).
Although these measuring devices have been governed in accordance with national law by way of domestic type approvals and calibration, measuring devices putted into use after the Measuring Instruments Directive are subject to a conformity assessment. Calibration is carried out by the calibration office or a nationally recognised test body. Each country has jurisdiction over this task and it is valid for all measuring devices that are recalibrated once the reverification period has expired as well as for “first calibrations” of measuring devices not subject to European law such as cooling measurements. All measuring devices not mentioned in the European measuring instruments directive as well as features specific to each country, such as the length of the calibration period and exceptions to mandatory verification, are subject to national law.
Influences in practical use
When you consider the calibration values of a flowmeter, ideally they should not deviate from the measuring values in the application.
References and measurement standards
Calibration usually takes place with the help of a “more accurate” measuring device. This device is referred to as the reference, the measurement standard or superior measurement standard.
Calibrations at KROHNE
KROHNE has calibration options for all kind of measuring devices at different locations worldwide.


