Calibration at KROHNE
Calibration is one of KROHNE’s core areas of expertise
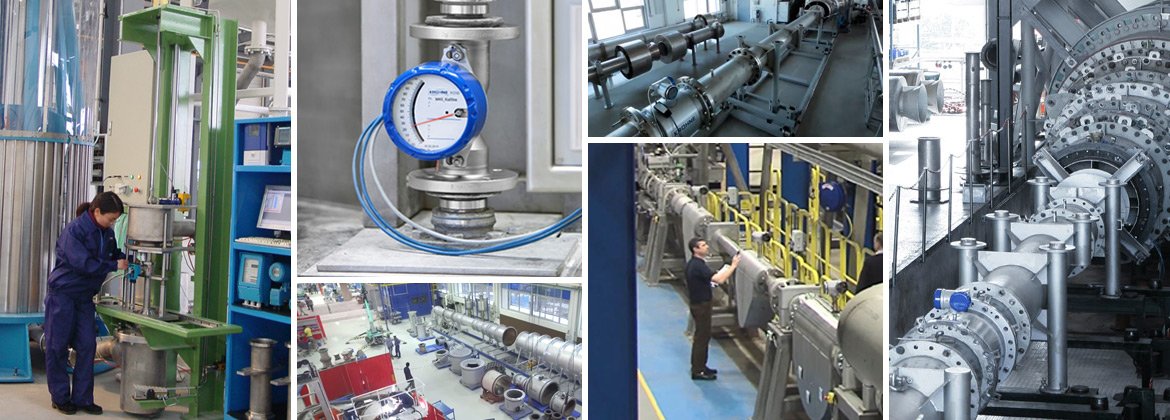
If you buy a KROHNE product, you will get a measuring device that performs most accurate with low uncertainty under real process conditions. To achieve this, we operate more than 120 calibration facilities for volume flow, mass flow, level, temperature, density and pressure to (wet-) calibrate any device we manufacture. For example, every flowmeter is wet-calibrated using water or air as standard before leaving our facilities. We can also provide customer specific calibration such as:
- Carry out multipoint calibrations
- Vary different parameters such as temperatures, viscosities, pressures etc.
- Use the actual medium or similar
- Build or emulate customer-specific flow geometries
- Use piping provided by the customer
For calibration we only use direct comparison of measurands (e.g. we calibrate our Coriolis mass flowmeters with a gravimetric weighing system). Our calibration rigs are the most accurate used in measuring device production worldwide: the accuracy of the reference is usually 5 to 10 times better than that of the meter under test.
This goes for small as well as for very large sizes: KROHNE operates the world’s most precise volumetric calibration rig for flowmeters up to DN 3000 (120″*) with a certified accuracy of 0.013 %. The reference vessel is a 44 m (144 ft*) high tank containing almost ½ million litres (132,000 gal*) of water which allows for a maximum flow rate of 30,000 m³/h (7,925,000 gal/h*).
Certified technology for fiscal & custody transfer applications
Our meters can be calibrated and certified according to various standards such as OIML, API, Measurement Instruments Directive (MI 001, 002, 004, 005), GOST, etc. All our calibration facilities comply to the traceability requirements according to ISO.
Regular inspections by national metrology institutes, round robin tests and alignments with national and international metrological standards according to ISO 9000 and EN 45000 guarantee the quality and comparability of our calibration rigs. Staff performing the calibrations are trained and given regular re-trainings to ensure quality and continuity.
Learn more about our comprehensive portfolio of calibration service.
The development calibration rig put into operation in 2009 is available for measurements of air-volume flows up to 2500 m3/h. Calibration is performed using two turbines that are regularly traced back to the measurement standard of a national body to ensure measuring accuracy. Figure 3.2 shows the measuring section and references of the large air calibration rig.
The production of the OPTISWIRL vortex flowmeter series represents the second large product line at the Duisburg site. For the calibration of the vortex flowmeters alone, two revolver calibration rigs were built. Through the rotation of the revolver, the measuring sections necessary to calibrate different nominal sizes can be rotated to the level of the measuring section without long conversion times. Calibration takes place with water at flow rates up to 575 m3 /h using electromagnetic flowmeters. Long inlet runs in front of the meter under test and specially fabricated inlet runs for the references guarantee precise measuring conditions with long-term stability. The flow points are started and measurement data is recorded automatically. The measurement data are stored in a database. Figure 3.3 depicts the large revolver calibration rig used to calibrate vortex flowmeters.
Flowmeters in the lower flow range can be calibrated with the help of the small air calibration rig up to 500 m³/h under normal conditions and 8 barg at temperatures up to 90 °C. Critical nozzles are used as reference. They are regularly traced back to national and international standards. In addition to being able to calibrate the flowmeters in a vertical or horizontal position, meters of varying physical measuring principles can be calibrated.
Influences in practical use
When you consider the calibration values of a flowmeter, ideally they should not deviate from the measuring values in the application.
References and measurement standards
Calibration usually takes place with the help of a “more accurate” measuring device. This device is referred to as the reference, the measurement standard or superior measurement standard.
Definitions
Any error of measurement detected during calibration as a result of repeat measurements is the so-called systematic measurement error.

